2nd Support Player
2nd Support Player
The 2nd Support Player has number of decisions to make, depending on the evolution of the breakdown and will be a result of the actions of the Ball Player and the 1st Support Player. Decision making may also be impacted by team tactics. Players may arrive at an attacking breakdown formation individually or simultaneously.
Priorities are supporting the 1st Support Player and protecting the Ball Player. The 2nd Support Player’s options are:
- To receive a pop pass from the Ball Player on the ground if 1st Support Player clears the threat or wins the space over the ball player
- To pick the ball off the ground (after the Ball Player presents and 1st Support Player clears the threat or wins the space over the Ball Player) and decide whether to pass or carry ball forward
- Depending on the actions of the 1st Support Player, clear defensive threats or protect the Ball Player on the ground by binding onto the 1st Support Player to create a protective formation either on top of or past the Ball Player
- To assist the 1st Support Player to win the space and protect the Ball Player before the opposition defence arrives
- To assist the 1st Support Player in clearing defensive threats around the Ball Player.
Responsibilities within the breakdown
- If Ball Player and latcher have engaged with the defence and are continuing to drive forward whilst on their feet, the 2nd Support Player can also join to add additional forward momentum. They should work to stay in control and on their feet, maintaining a low, dynamic driving position.
- If receiving a pass, or picking the ball is not an option then the 2nd Support Player should either join the 1st Support Player to clear opposition defence or create a strong protective formation over the Ball Player to enable continuity of attack. If the 1st Support Player clears the threat to the Ball Player on the ground, then the 2nd Support Player will assume the responsibilities of the 1st Support Player.
- To win the space or protect the Ball Player, the 2nd Support Player should:
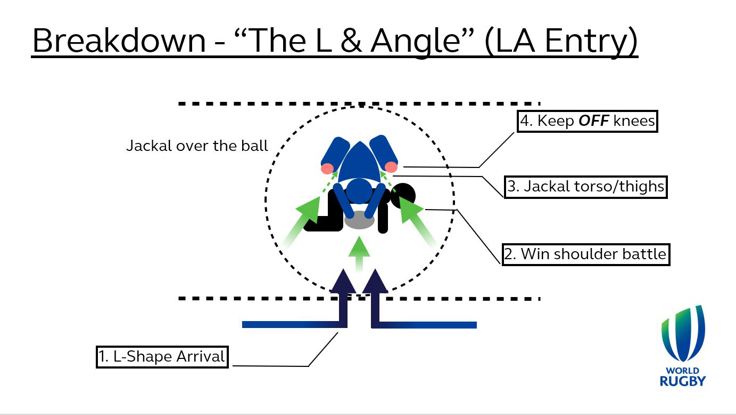
- Enter the attacking breakdown tunnel through the imaginary powerline, making sure of legal entry and “square up / L” into contact (see below)
- Drop body height and stay square at powerline – staying low and in control
- Bind on to the 1st Support Player if they have not cleared the threat
- support own bodyweight, staying square, eyes looking forward, scanning for potential threats (i.e., counter-ruck).
- Assist the 1st Support Player to maintain a strong shape and low body height by binding on in a controlled and legal manner. Bind onto both the Ball Player and 1st Support Player (all the players in the attacking breakdown formation should be connected). If 1st Support Player has taken out the threat – then they take the place of the 1st Support Player at the front of the attacking breakdown.
- Be aware of ball presentation by the Ball Player. The hindmost foot of the last player within the attacking breakdown is the offside line.
- Once the ball has been cleared from the attacking breakdown formation, work to get out, and ready for next phase.
- To assist in clearing the defensive threat(s), support players should:
- Enter the attacking breakdown tunnel through the imaginary powerline, making sure of legal entry and “square up / L” into contact (see below)
- Drop body height and stay square at powerline – staying low and in control
- Connect with the defensive threat and clear out in a legal manner (i.e., shoulder battle, drive through low to high angles, angle clean out, destabilisation techniques, decision head in and under jackler torso or head above depending on space available )
- Work to get out, and ready for next phase.