The Tuck Jump test
According to Myer and colleagues in 2008, this test was specifically created to assess female athletes who demonstrate “high risk” landing mechanics. Evidence from Myklebust and colleagues in 1998 suggests that female athletes across many sports demonstrate a 4 to 6 times higher incidence of non-contact anterior cruciate ligament (ACL) injury compared to male athletes participating in the same landing and pivoting sports.
Further according to McLoughlin and colleagues in 2019, injuries to the knee are common in both male and female players within the community and amateur club game. Given this finding across several studies, the tuck jump can be considered a useful test or screen to assess injury risk potential and many clinicians and therapists use this test as part of a return to play assessment protocol. In addition, studies have reported acceptable levels of both intra- and inter-reliability for this test. This reliability means that the test reports consistent results across different administrators and over time (Myer et al 2008, 2011, Herrington et al 2013).
Tuck jumps are used to train athletes across a wide range of sports to increase lower body power. The same exercise – the tuck jump – can also be used as an assessment to grade improvement in technique during a training period. The following test administration procedures will allow the S&C coach and the medics to track improvements across the training period in this easily administered test.
Preparation
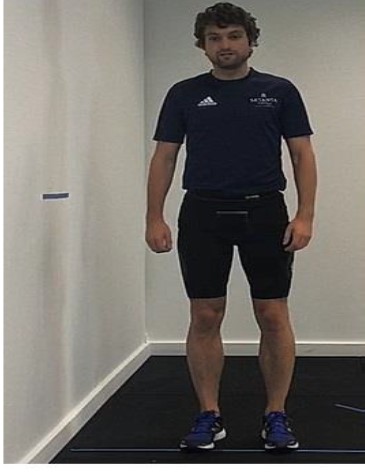
To set up a standardised procedure to assess the tuck jump, use wall markers at a height of the top of the player’s thigh when they flex the hip at 90 degrees when standing upright (Figure 4.). Also place a tape marker on the ground representing the player’s feet position the equivalent of shoulder-width apart. The tuck jump assessment should ideally be filmed (smartphones are suitable and easy to use) from both a front and lateral view.
Figure 5. Test Set-up: Note the player standing with a wall marker tape at a level of the top of the player’s thigh. Also note a tape placed on the floor level with the player’s toes.
Procedure
The player completes 10 rapid, consecutive tuck jumps while taking off and landing in the one place. A video recording will allow a thorough inspection following the test but the coach may choose to assess the tuck jump with the help of a second person, should they not have access to video capture.
The front and side view check list (see Table 1. below) provided a total of 10 items to observe and check during the performance of the 10 tuck jumps. Using two test administrators, one can inspect from the side while the other may inspect from in front of the player. The player’s technique for each metric is subjectively rated as either having an apparent deficit or not (for every deficit or fault observed from the checklist the player is allocated 1 point). The higher the score the more deficits observed. The deficits are checked and are then summed or tallied for the final assessment score.
Indicators of flawed techniques should be noted and should be focused on during subsequent training sessions. The player's baseline performance can be compared to repeated assessments performed at the midpoint and conclusion of training periods, to objectively track improvements in jumping and landing technique.
Table 1. Assessment Checklist
| Front View Checklist | Side View Checklist |
| Lower extremity valgus (Knees collapsing inwards) when landing | Thighs do not reach parallel to marker on wall |
| Thighs not equal side to side (during flight) | Foot placement on ground not parallel (front to back) |
| Foot placement not shoulder width apart | Not landing in same footprint |
| Foot contact timing not equal | Excessive landing contact noise |
| Pause between jumps | Technique declines prior to 10 seconds |
Please view the video of the player performing the test. Try and assess the player using the criteria in Table 1 above.
Corrective Exercises for the Tuck Jump test
While the Tuck Jump test has a checklist of a number of potential deficits that can be observed we will focus on corrective exercises for knee valgus or knees collapsing inwards during landing. This is a very risky position for knee health.
Glute bridge with band
- Player loops a miniband around their legs just above the knees
- Lays back, bends their knees and places their feet flat on the ground close to their glutes
- Squeezes their glutes to raise their hips up off the ground while pushing their knees out against the band
- Holds for a second at the top and then lowers back to the ground
- Repeats for the desired repetitions.
Drop Squat
- From a standing position, player reaches up as high as possible up onto their toes
- In one swift movement drives their arms down so their hands travel by their pockets and drops into a quarter squat position
- Absorbs the force and lands quietly on their midfoot with their knees kept in line with their toes
- Repeats for 3 sets of 5 repetitions and focuses on the quality of the movement.
Drop landings
- Player steps off a box of about knee height
- Lands and absorbs the force quickly with a slight flexing of the hips, knees and ankles
- Lands softly on their midfoot and keeps their knees out in line with their toes.